Greenshot makes saving a lot of screenshots very quickly. You can easily configure it to save the exact part of your screen all in one place. Here are steps below:
- Download, install and run Greenshot from https://ninite.com (safe and secure source for software)
- Right click the tray icon (Green G in the task bar
 ) and press settings
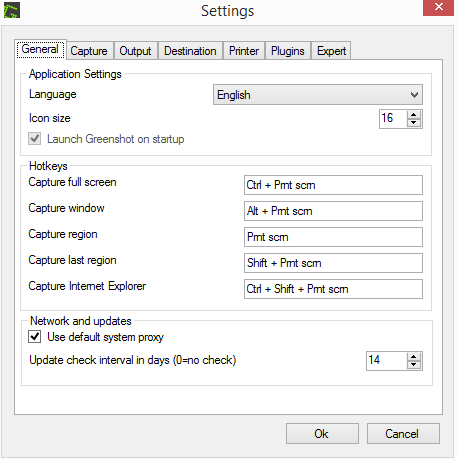
 - Go to “General” tab. Setup Greenshot to use the hot keys / shortcut keys you want

- Here you can set the exact shortcut to capture full screen (Yes the entire screen)
- Capture the active window
- Capture region means you choose exactly which part of screen to take screenshot. A box pop ups and you get to move / expand / set the box to exactly where you want. I use this a lot because often times I do not want to capture an the entire window.
- Go to “Destination” tab. This is where you set the exact place of what happens after you take screenshot.
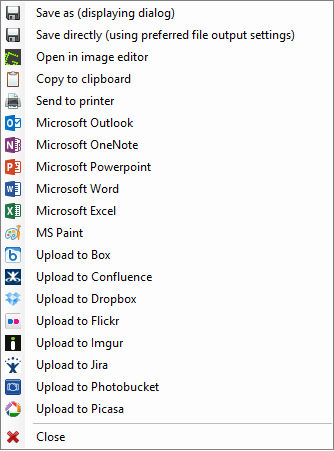
- “Select destination dynamically” means each time you take screenshot, you get a full menu bar of choices.

- But if you are doing a very repetitive task, it is a waste of time each time to choose the same option. If you uncheck “Select destination dynamically” you can select exactly what you want to happen to the image. Here is my favourite setup:

Turn on “Save Directly using preferred file output settings” and “Open in image editor” - Set the preferred destination on the “Output” tab

- This way each time it saves, it saves to the same spot and opens a very fast Greenshot image editor for me to do any edits
- If you do not need to do any edits at all you can just uncheck “Open in image editor”. This way it just keeps on saving screenshots!
- “Select destination dynamically” means each time you take screenshot, you get a full menu bar of choices.
- Press OK now you are ready. Test a few quick screenshot actions!
Example:
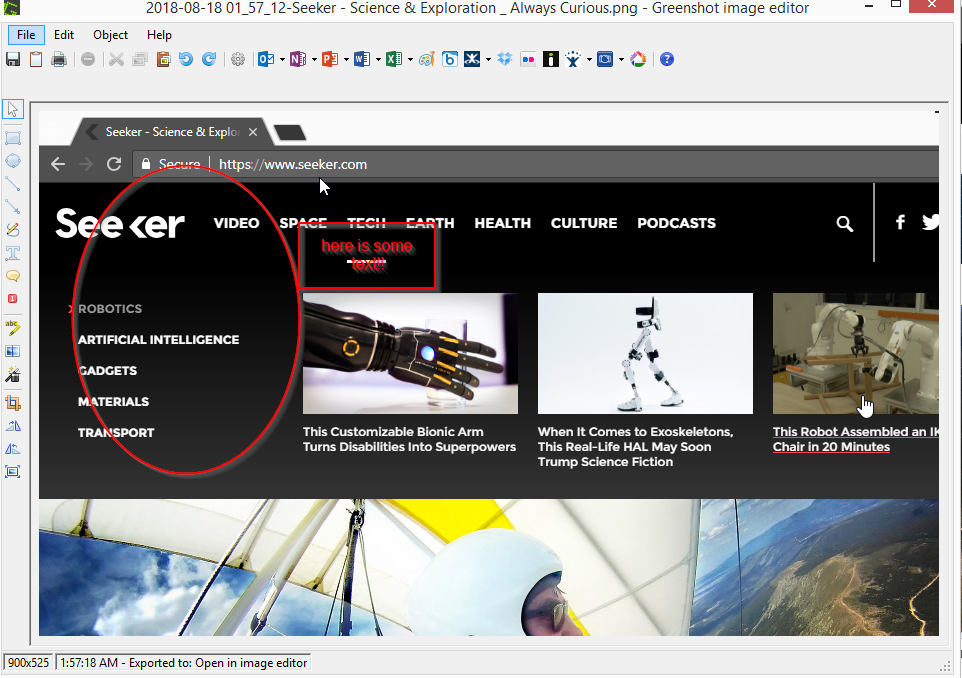
- Here is some examples using the above setup – with the image editor I can do some simple markings. I can also close the window quickly. The good thing about using the built-in Greenshot image editor is that it loads very fast and so there is no wait time.

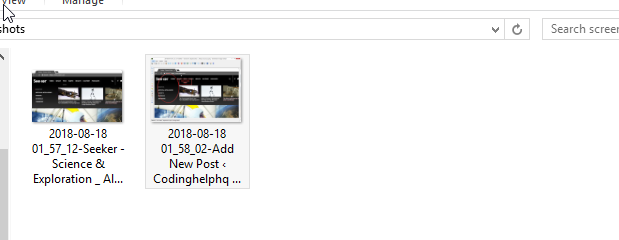
- In here, here is a folder with all the images saved!

Here is a video explaining the same: